Feeling buried in two-sided paperwork? You’re not alone. Learning how to scan double sided documents is the key to turning those overwhelming stacks into clean, organized digital files. This isn’t just about clearing your desk; it’s about gaining peace of mind and reclaiming valuable time. The good news is, you don’t always need a fancy scanner—sometimes, a simple smartphone app will do the trick.
Conquer Paper Chaos with Duplex Scanning
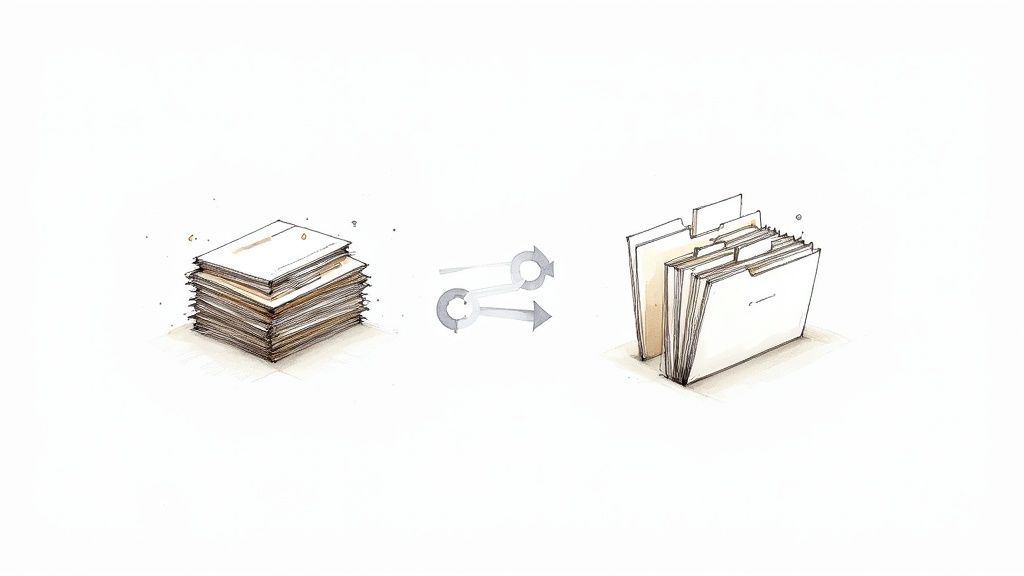
If you’re staring at piles of contracts, invoices, or old reports, that feeling of dread is completely normal. The thought of feeding each page into a scanner, flipping it over, and scanning it again is a classic productivity killer. It’s a massive time sink, and worse, it often results in a jumble of digital files that are just as messy as the paper you started with—a pain point that keeps you from finding what you need.
This guide is here to show you a much better way. We’ll walk through how duplex scanning—capturing both sides of a page in a single pass—can transform your workflow. This is more than just a scanner setting; it’s about reclaiming your time and building a system that gives you the peace of mind that comes with true organization.
The Shift to Smarter Scanning
Going digital with two-sided documents isn’t just a productivity tip; it’s become the standard. The demand for duplex scanners is so high that the global market for them hit USD 2.85 billion in 2024. This boom is driven by industries like finance, healthcare, and government, where getting documents digitized quickly and accurately is non-negotiable. You can explore more about the rise of duplex document scanners and see just how big this shift is.
The real goal of scanning isn’t just to make a digital copy. It’s to build an organized, searchable system so you can find exactly what you need, right when you need it.
Your Path to Effortless Organization
In this guide, we’ll get into practical, actionable methods you can use immediately. We’ll cover everything from dedicated office scanners with automatic document feeders (ADFs) to the powerful scanning apps you can use on your phone.
Here’s a quick look at what you’ll gain:
- Massive Time Savings: Literally cut your scanning time in half by capturing both sides at once. Imagine turning an hour-long task into a 10-minute job.
- Eliminate Digital Clutter: Create a single, perfectly ordered PDF instead of a mess of separate page files.
- Find Information Instantly: Turn paper into searchable digital files, making it easy to track down what you need later.
- Achieve Peace of Mind: Finally create a reliable system that keeps important documents safe, organized, and out of your way.
By the time you’re done here, you’ll know how to pick the right tool for the job and set up a workflow that puts an end to the paper chaos for good.
Picking the Right Scanning Tool for the Job
Getting your scanning right starts with the tool you use. Your choice can mean the difference between spending a few minutes or a few hours on a task, so it pays to know your options.
Think about it: scanning a 100-page contract is a totally different beast than scanning a couple of two-sided receipts. Using the right method for the job isn’t just about getting a digital copy; it’s about building a workflow that’s efficient and doesn’t drive you crazy.
Let’s look at the three main ways to tackle double-sided documents.
The Powerhouse: Duplex ADF Scanners
If you deal with stacks of paper regularly, a scanner with a duplexing Automatic Document Feeder (ADF) is your best friend. These machines are purpose-built for high-volume work. You just load the paper, hit “scan,” and it zips through the stack, capturing both sides of every page in one go.
This is the ultimate tool for productivity:
- Big Jobs: Think digitizing long contracts, entire client files, or multi-page financial reports in minutes, not hours.
- Time-Critical Work: When you need to process a pile of invoices or new-hire paperwork fast and without mistakes.
- Pure Productivity: The ability to “set it and forget it” is a huge time-saver, freeing you up to focus on work that actually matters.
This kind of efficiency is a game-changer. It’s why many businesses are investing in production scanners that can process up to 300 pages per minute (ppm). In today’s fast-paced environment, duplex scanning isn’t a luxury—it’s essential. You can dig into this global trend and see how duplex scanners drive efficiency in various markets.
The Manual Method: Flatbed or Single-Sided Scanners
No dedicated duplex scanner? No problem. You can still get the job done with a standard flatbed scanner or a single-sided document feeder. It just takes a little more hands-on effort.
The process is simple: scan all the front sides of your pages first. Then, you carefully take the stack, flip it over, and scan all the back sides. It definitely requires more attention to keep your pages in the right order, but it’s a perfectly good solution for smaller, occasional tasks like scanning a two-sided ID or a short agreement.
The On-the-Go Option: Your Smartphone
Never underestimate the power of the scanner in your pocket. Modern smartphone apps like Microsoft Lens or Adobe Scan are surprisingly good at handling double-sided documents.
This is my go-to for capturing receipts on a business trip, signing and sending back a contract from a coffee shop, or just digitizing something important when I’m away from my desk. It’s the ultimate tool for immediate, low-volume needs.
These apps walk you through capturing the front, then the back, and neatly stitch them together into a single PDF. The trick to getting a great mobile scan is good, even lighting and a dark, contrasting background. With a steady hand, the results can look just as good as a flatbed scan.
Plus, most of these apps can make your scans searchable with Optical Character Recognition (OCR), turning a simple picture into findable data. You can learn more about how an OCR document organizer works and see how it transforms your digital files.
Comparing Your Double-Sided Scanning Options
To help you decide at a glance, here’s a quick rundown of how these three methods stack up against each other.
| Method | Best For | Speed | Convenience | Key Consideration |
|---|---|---|---|---|
| Duplex ADF Scanner | Large batches, office environments, and big archiving projects. | Very Fast | High | The most efficient option by far, but requires specialized hardware. |
| Manual Scanner | Occasional scanning of shorter documents (e.g., IDs, applications). | Slow | Medium | Requires you to manually flip pages and stay organized to avoid errors. |
| Smartphone App | On-the-go scanning, receipts, and single documents away from a desk. | Fast (for single docs) | Very High | Scan quality depends heavily on lighting and a steady hand; best for low-volume. |
Ultimately, the best tool is the one that fits your specific situation. Having a high-speed ADF scanner is amazing, but sometimes the most convenient option is the phone you already have with you.
Your Automated Workflow with a Duplex Scanner

This is where the real magic happens. If you’ve got a scanner with an Automatic Document Feeder (ADF), you’re ready to move past tedious manual work and build a truly efficient system. It’s not just about scanning faster; it’s about creating a process that delivers perfect digital files every time you hit “scan.”
When you get this right, you can load a stack of paper, walk away, and come back to a perfectly organized, searchable digital document. That’s the goal: turning piles of paper into useful assets without having to babysit the machine.
Preparing Your Documents for a Flawless Scan
Before you even think about software settings, a little physical prep work can save you a mountain of headaches. Trust me, paper jams are the ultimate productivity killers, and they are almost always preventable.
Take a moment to get your stack of papers ready. This small ritual is the key to a smooth, uninterrupted scan.
Here’s my go-to pre-flight checklist:
- Remove All Fasteners: Hunt down and pull out every single staple and paper clip. They’re guaranteed to cause a jam and can even leave a nasty scratch on your scanner’s glass.
- Check for Sticky Notes: Peel off any Post-it notes. They can easily get stuck inside the feeder mechanism or, worse, cover up critical information on a page.
- Fan the Pages: Grab the stack, give it a gentle bend, and then “fan” the edges with your thumb. This simple move breaks the static cling that often makes pages stick together and cause double-feeds.
- Straighten and Align: Tap the stack on your desk to make sure all the edges are perfectly even. A neat, aligned stack helps the feeder grab one—and only one—page at a time.
This whole process takes less than a minute, but it makes all the difference, especially when you’re learning how to scan double sided documents in a big batch.
Dialing in the Perfect Scanner Settings
Okay, now it’s time to tell your scanner exactly how you want the job done. While every scanner’s software looks a little different, the essential settings are pretty much universal. Getting these right from the start means your final document will be high-quality, searchable, and clutter-free.
Find the settings menu or an “Advanced Settings” button in your scanner’s software. This is your command center for automated, high-quality scanning.
Think of your scanner preferences as a “set it and forget it” task. Once you find the right combination for your typical documents, you’ll rarely have to touch these settings again.
Here are the crucial settings to lock in:
- Source: Always choose “Automatic Document Feeder” or “ADF”. This tells the scanner you’re using the top tray, not the flatbed glass.
- Duplex/2-Sided Scanning: This is the most important one. Look for an option labeled “Duplex,” “2-Sided,” or “Scan Both Sides.” Turning this on is what activates the scanner’s ability to capture the front and back of each page in one pass.
- Resolution: For most documents, 300 DPI (dots per inch) is the sweet spot. It produces crisp, clear text that’s ideal for Optical Character Recognition (OCR) without creating massive file sizes. Anything lower can look fuzzy, and anything higher is usually overkill.
- Color Mode: I usually stick with “Color” as a default, just in case there are colored letterheads, signatures, or highlights. If you know for sure a batch is just black and white text, “Grayscale” will give you a smaller file.
- File Format: Stick with PDF. It’s the universal standard for documents, keeping everything in a single, easy-to-share file.
Fine-Tuning for Maximum Productivity
With the core settings handled, a couple of extra tweaks can take your workflow from good to amazing. These features automate the cleanup, saving you from having to manually edit your PDFs later.
The most valuable one, in my experience, is Blank Page Removal (sometimes called Skip Blank Pages). When you enable this, the scanner is smart enough to detect and discard any empty sides. This is a lifesaver when you’re scanning a mix of single-sided and double-sided pages, because you won’t have to go through and delete all the blank pages yourself.
Another incredibly useful tool is Auto-Orientation or Text Recognition Orientation. This feature analyzes the text on each page and automatically rotates any that are upside-down. Your final document comes out perfectly aligned and ready to read.
By combining good prep with smart settings, you create a powerful, hands-off system. Your scanner does all the repetitive work, and you get a perfect digital file every single time.
Don’t Have a Duplex Scanner? No Problem.
So you’ve got a stack of two-sided documents but your scanner only handles one side at a time. Don’t sweat it. You absolutely don’t need a fancy machine with an automatic document feeder (ADF) to get a perfect digital copy.
With a little bit of a system, you can easily create a perfectly ordered PDF. Honestly, taking a few extra minutes to do it right up front saves a massive headache later on. Trying to sort out a jumbled digital file page-by-page is a real nightmare, and this process completely avoids that.
The trick is simple: scan all the fronts, then scan all the backs. The part that trips most people up is how to flip the stack and reorder the pages correctly. Let’s break down a foolproof method.
The Scan, Flip, and Re-Scan Workflow
Your goal here is to create two separate PDF files. The first will have all the odd-numbered pages (the fronts), and the second will have all the even-numbered pages (the backs). Splitting the job into these two parts is what keeps everything from turning into a mess.
I like to think of it like dealing a deck of cards. You go through one side of every page first, keeping them in their original order, before you even think about the other side. This is the key when you need to figure out how to scan double sided documents without the machine doing the work for you.
Here’s exactly how to get it done.
Prep Your Stack: First things first, get rid of any staples or paper clips. Give the stack a good tap on the desk to make sure all the pages are squared up. Place them with page one on top, face-up, ready to go.
Scan the “Odd” Pages: Load the whole stack into your scanner’s feeder (or just place the first page on your flatbed). Scan the entire batch and save it as a single PDF. Give it a clear name you won’t forget, like
Contract_Pages_Odd.pdf. This file now contains pages 1, 3, 5, 7, and so on.The Critical Flip: This next move is the most important part of the whole process. Take the stack of pages that just came out of the scanner. Do not shuffle or reorder them in any way. Simply flip the entire stack over as one unit. The last page you scanned should now be on top, face-down.
Scan the “Even” Pages: Now, feed this freshly flipped stack into your scanner. Scan this second batch and save it as a new PDF file. A good name would be
Contract_Pages_Even.pdf. This new file has all your even pages, but in reverse order (e.g., 8, 6, 4, 2). That’s exactly what we want.
You’ve done the hard part. By keeping the pages in two clean batches—odds and evens—you’ve set yourself up for an easy win. Now you just need to use a simple software tool to put the two puzzle pieces together.
Putting It All Together
With your two PDFs ready, it’s time to merge them. Plenty of software tools are built for exactly this scenario. They’re smart enough to know that the second file (your even pages) needs to be reversed before being woven into the first file.
Here are a few common tools that get the job done:
- Adobe Acrobat Pro: This is the gold standard for a reason. It has powerful page organization features that let you reverse the order of your “even” pages file with a click and then interleave it with the “odd” pages file.
- Free Online PDF Mergers: A quick search will turn up dozens of websites that can combine your files. Just be sure to look for one that offers an “interleave” or “mix pages” option. This will automatically put them in the correct 1, 2, 3, 4 order.
- Built-in Scanner Software: Take a look at the software that came with your scanner. Even some basic models have a feature called “Manual Duplex” or “2-Sided Scan Assist.” This will guide you through the process, scanning the first side and then prompting you to flip the stack, handling all the software magic for you.
This manual approach means you can digitize any two-sided document with confidence. You don’t need expensive hardware to know your important paperwork is being archived correctly.
Scanning on the Go with Your Smartphone
Let’s be honest, you don’t always have a scanner handy when you need to digitize a document. The good news is, you probably have a powerful one right in your pocket. Your smartphone, armed with the right app, can produce surprisingly clean and professional scans, letting you handle paperwork from literally anywhere.
This is a game-changer for capturing receipts on a business trip, signing and sending back a contract from a café, or scanning an ID without running back to the office. It’s the kind of flexibility that dedicated hardware just can’t offer, turning a potential roadblock into a two-minute task.
Getting Crisp, Professional Scans from Your Phone
Modern scanning apps like Microsoft Lens or Adobe Scan are incredibly sophisticated. They do more than just take a picture; they use your phone’s camera to create high-quality PDFs, often with built-in text recognition. The real trick to getting great results is to give the app a clean shot to work with.
To get scans that look like they came off a proper office machine, just follow these simple tips:
- Find Good Lighting: Bright, even light is your best friend. Try to avoid casting shadows over the page or getting a nasty glare from an overhead light, as both can make text hard to read.
- Use a Contrasting Background: Lay your document on a dark, flat surface. This simple trick helps the app’s edge detection find the corners of the paper instantly and accurately.
- Keep a Steady Hand: Hold your phone parallel to the document, directly above it. This prevents that weird, skewed perspective. Most apps have an auto-capture feature, so just hold steady and let it snap the picture for you.
Following these steps is the key to producing a document that’s legible and professional. It’s particularly useful if you’re exploring scanning docs on your iPhone for a paperless life.
A Simple Process for Two-Sided Documents
Scanning a two-sided document with an app isn’t a puzzle you have to solve. The app guides you through it, handling the job of stitching the front and back sides into a single, cohesive file. While the buttons might look a little different from one app to another, the basic idea is the same everywhere.
The real power of mobile scanning is its immediacy. You can capture, combine, and send a multi-page, two-sided document before you’ve even left a meeting, ensuring nothing falls through the cracks.
The infographic below shows the classic manual process: scan the fronts, flip the whole stack, then scan the backs.

Mobile apps make this even easier. You’ll typically enter a multi-page mode. Scan the first side, tap an “add page” button, flip the document over, and scan the other side. You just repeat that little sequence for every page you have. When you’re done, you export the whole batch as one perfectly ordered PDF. This simple flow removes any guesswork about how to scan double sided documents when you’re out and about.
Turning Digital Scans into an Organized System
Getting a clean scan is a great first step, but it’s really only half the job. The real payoff—that sense of calm you’re looking for—comes from knowing you can pull up that exact file months or even years down the road without a frantic, stressful search. What you do in the moments right after you scan is what separates an organized system from a new pile of digital clutter.
This is where you stop being a digital archivist and let a smart system take over. It’s the key to turning a simple scanning habit into a powerful, self-organizing workflow that gives you back your time and mental energy.
Name Your Files for Future-You
Before you even think about where to put the file, let’s talk about a simple but incredibly powerful habit: consistent file naming. A file named Scan_001.pdf is a ghost in your system; it tells you nothing and is nearly impossible to find later.
The goal is to name files in a way that lets you find them just by thinking about what they are. A reliable formula I’ve used for years includes the date, the source (like a vendor or client), and a quick description.
For instance, instead of the generic Invoice.pdf, try this:
2023-10-26_Vendor-Name_Invoice-123.pdf
This name is a mini-database. You can instantly sort by date, search for “Vendor-Name,” or pinpoint a specific invoice number. This one small tweak transforms your digital archive from a messy shoebox into a structured, searchable library. Adopting this strategy is a cornerstone of learning how to organize digital files for maximum productivity and peace of mind.
Get Out of the Manual Filing Rut
So, you’ve got a perfectly scanned, well-named document. Now what? For most of us, this is where the drudgery begins: navigating through endless folders to drag and drop the file into its final home. Click, drag, drop. And repeat. It’s a tedious cycle that chips away at your focus.
This manual work is a huge productivity killer. It’s repetitive, boring, and surprisingly easy to mess up. One little distraction, and a critical contract ends up in the “Receipts” folder, lost until you desperately need it. This is precisely where AI-driven automation changes everything.
True organization isn’t about getting better at filing; it’s about making filing obsolete. Automation frees you to focus on meaningful work, not digital housekeeping.
Imagine a system that just… works. You finish scanning a stack of double-sided documents, and that’s it. You’re done. The system handles the rest, giving you back that time and mental energy.
Let an Automated Workflow Do the Heavy Lifting
This is exactly what AI-powered tools like Fileo are built for. Instead of you having to read every single document to figure out where it belongs, an intelligent system does it for you. This is the solution to the pain point of manual document management.
Here’s what that hands-off process actually looks like:
- You Scan It: Just scan your document—an invoice, a client contract, a project brief, whatever.
- Fileo Analyzes It: The system instantly reads and understands the file’s content using its built-in text recognition.
- Fileo Renames & Files It: Based on what it reads, it automatically renames the file using your rules and moves it to the perfect folder in your cloud storage.
An invoice from “Creative Solutions” is automatically named 2023-11-15_Creative-Solutions_Invoice-789.pdf and moved right into your /Finances/Invoices/2023/ folder. You didn’t have to do a thing. This not only eliminates human error but, more importantly, saves you countless hours over time. That’s the real path to less stress and more productivity.
A Few Common Questions About Duplex Scanning
Even with the best gear, you’ll probably run into a few snags or questions when you’re scanning double-sided documents. Getting these little details right from the start is the key to a smooth workflow and perfect digital files. It saves a ton of time and prevents those annoying do-overs later.
Let’s walk through some of the most common questions people ask.
What’s the Best Resolution to Use?
For the vast majority of your documents—think contracts, invoices, or reports—300 DPI (dots per inch) is the sweet spot. It’s the industry standard for a reason. You get a sharp, clear image that’s perfect for OCR software to read accurately, and it keeps your file sizes from getting out of hand.
Now, if you’re scanning something with super fine print or intricate diagrams, you might consider bumping the resolution up to 600 DPI. But honestly, for everyday office paperwork, 300 DPI nails that perfect balance between quality and file size.
What Do I Do If the Paper Jams Mid-Scan?
A paper jam in the middle of a big batch scan feels like a showstopper, but it’s usually an easy fix. The first thing you need to do is stop the scan job right away. Don’t let it keep trying to feed, as that can damage both the paper and your scanner.
Gently open the feeder cover and pull the stuck page out in the direction it was already heading. Take a close look inside for any tiny torn scraps of paper left behind—those little bits can cause future jams. Before you resume, just grab your stack of documents and give it a quick “fan” with your thumb to make sure the pages aren’t sticking together. That simple trick can prevent the next jam.
Can I Mix Single-Sided and Double-Sided Pages in One Batch?
Yes, you absolutely can! This is a massive time-saver, and thankfully, most modern scanners are designed to handle this exact scenario. The secret is to find and enable a couple of key settings in your scanning software before you hit the start button.
You’re looking for two options:
- Duplex or 2-Sided Scanning: This tells the scanner to capture both sides of every single page.
- Skip Blank Pages: This is the real game-changer. The scanner will automatically detect and throw out any sides that are completely blank.
With both of those settings turned on, you can just load your mixed stack of documents and let the scanner do the hard work. It will process the entire pile and spit out a clean PDF with no empty pages for you to delete manually.
Ready to stop filing and start living? Let Fileo automate your document organization. Discover how Fileo can give you back hours of your week.