Let’s be real—renaming files one by one is a soul-crushing task that drains your time and focus. Thankfully, you don’t have to live that way. You can mass rename files using built-in tools on your computer (like Windows File Explorer or macOS Finder), grab a specialized app for more complex jobs, or even use the command line for ultimate control. These methods turn a tedious chore into a quick, automated process, giving you back hours of your day and a welcome sense of peace of mind.
The Hidden Cost of Disorganized Files
We’ve all been there: frantically searching for Final_Report_v2_final.docx or scrolling through a sea of IMG_8817.JPG. This digital clutter isn’t just a minor headache; it’s a silent productivity killer. It’s the pain point that chips away at your focus, adds unnecessary stress, and makes your day harder than it needs to be.
Every time you have to stop what you’re doing to hunt for a document, your workflow breaks. Renaming your files isn’t just about being tidy—it’s a strategy for bringing clarity and order back to your digital life. It’s about building a system where you can find what you need instantly, so you can get back to the work that actually matters and enjoy the peace of mind that comes with an organized workspace.
Finding the Right Tool for the Job
The good news is that you already have powerful tools at your fingertips, no matter what operating system you’re on. From simple, built-in features to more advanced apps, there’s a method that will fit your comfort level and get the job done efficiently.
This simple flowchart breaks down the common paths for different operating systems.
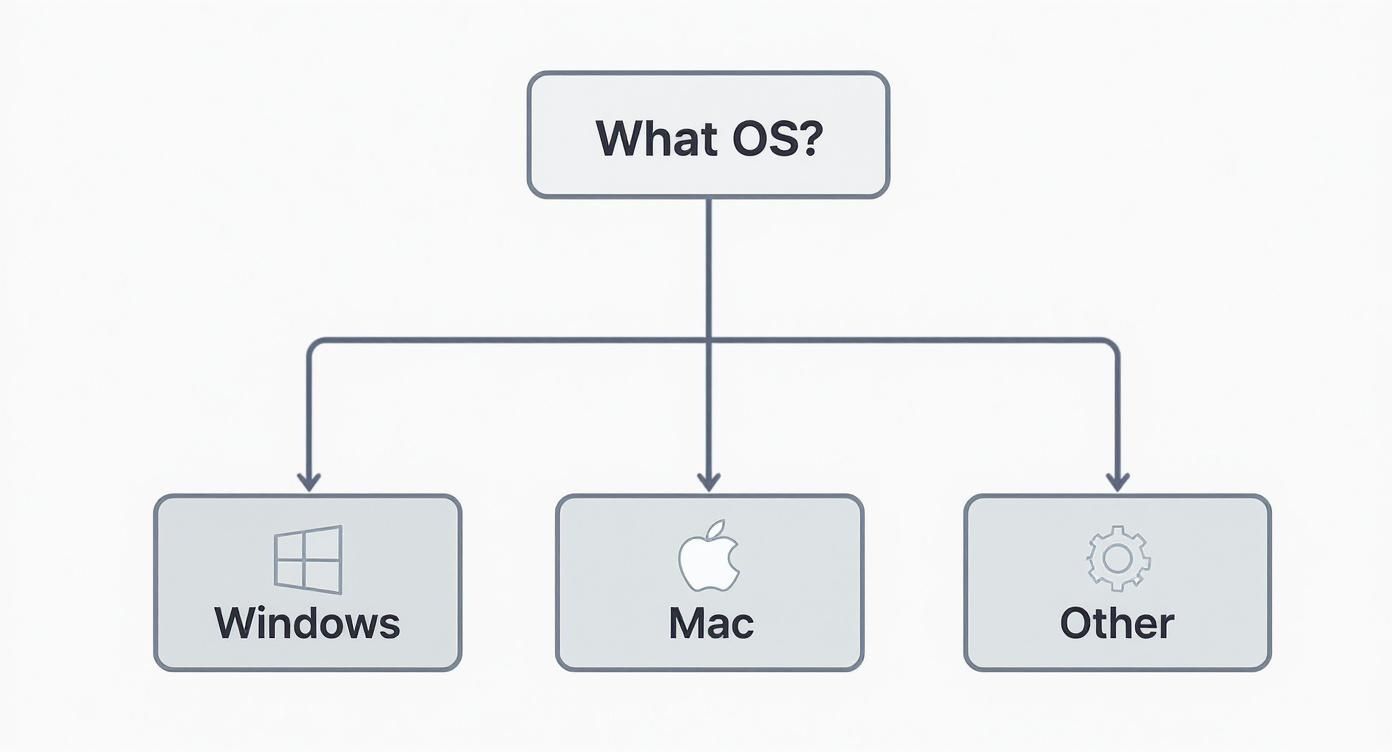
As you can see, every major platform gives you options, so you’re never stuck without a way to bring order to your files.
This need for better file management isn’t just a personal pet peeve; it’s a huge market trend. The mass rename tool market has grown into a USD 1.12 billion industry, driven by the massive amount of data we all create every day. It shows a real shift toward smarter digital organization, especially in fields like healthcare and finance where accuracy and efficiency are critical.
The goal is to move from a reactive state of searching for files to a proactive state of knowing exactly where everything is. A consistent naming convention is the foundation of that system.
Your Quick Guide to Mass Renaming Methods
Find the right tool for your needs with this quick summary of the best ways to mass rename files across different platforms.
| Platform / Method | Best For | Skill Level | Key Feature |
|---|---|---|---|
| Windows File Explorer | Simple, sequential renaming | Beginner | Built-in, no downloads needed |
| Windows PowerRename | Complex find-and-replace tasks | Intermediate | Regular expression support |
| macOS Finder | Basic batch renaming | Beginner | Integrated directly into the OS |
| macOS Automator | Creating custom, reusable workflows | Intermediate | Highly customizable actions |
| Command-Line (PowerShell/Terminal) | Maximum power and scripting | Advanced | Unmatched flexibility and speed |
| Third-Party GUI Apps | User-friendly advanced features | Beginner to Intermediate | Previews, undo, and presets |
This table should help you pinpoint the best starting point based on what you’re trying to accomplish and how comfortable you are with different tools.
Why a Naming System Is Your Best Weapon
A logical naming convention is the cornerstone of any organized digital workspace. It turns a chaotic mess of files into a predictable, sortable, and searchable database.
Think about the productivity benefits:
- Instant Identification: A file named
2024-05-21-Client-Proposal-Draft.pdftells you everything you need to know without even opening it. - Effortless Sorting: Files automatically line up by date or project, making it simple to find the latest version.
- Reduced Mental Load: You no longer have to remember what
Document1.docxwas for. The filename does the heavy lifting, freeing up your brainpower for more important tasks.
Building a consistent system is your first step toward taking back control. If you want to dive deeper into creating a bulletproof system for all your digital assets, you can learn more about how to organize digital files for maximum productivity .
In this guide, we’ll walk through the practical, step-by-step methods to make this happen, so you can save hours and finally achieve digital clarity.
Quickly Rename Batches of Files on Windows
If you’re on a Windows machine, you’re in luck. You already have some great built-in tools for renaming files in bulk. Forget the tedious, mind-numbing process of clicking, renaming, and repeating. We’ll walk through a few actionable methods that will save you a ton of time and bring some much-needed order to your digital life.
Let’s start with the simplest trick in the book, right inside File Explorer. Imagine you just got back from a trip with a camera full of photos named IMG_4567.JPG, IMG_4568.JPG, and so on. Just select all of them, right-click the very first one, hit “Rename” (or just press the F2 key), and type something descriptive like Hawaii-Trip.
Poof. Windows instantly renames the whole batch to Hawaii-Trip (1), Hawaii-Trip (2), and so on. It’s a quick-and-dirty method, but it’s perfect for when you need basic sequential naming done in seconds.
Unlock Real Power with PowerRename
For more granular control, you need to get your hands on PowerRename . It’s a free utility from Microsoft’s own PowerToys suite, and honestly, it’s a game-changer for anyone who deals with files regularly. Once installed, it adds a powerful renaming option straight into your right-click menu.
Think of it as “find and replace” on steroids, but for your filenames. Let’s go back to those vacation photos. Instead of the generic numbered files, what if you wanted them neatly labeled Hawaii-Trip-001.JPG, Hawaii-Trip-002.JPG, and so on? PowerRename makes that a breeze.
- Search for:
IMG_(the default prefix from your camera) - Replace with:
Hawaii-Trip- - Enable: Tick the “Enumerate Items” option to add those slick sequential numbers.
Here’s a look at the PowerRename interface in action.

That preview pane on the right is your best friend. It shows you exactly what the new filenames will look like before you commit. This feature alone has saved me from countless headaches and gives you the confidence to tackle hundreds of files at once.
The most significant benefit of a tool like PowerRename is the ability to see the outcome before you act. This simple preview feature removes the anxiety from bulk operations and encourages better file management habits.
It’s no surprise that tools like this are becoming more popular. The market for batch-replace software is expected to hit USD 2.5 billion by 2031, growing at around 9.5% annually. This boom is fueled by the sheer volume of digital content we all create and the critical need for efficient ways to manage it. You can see more about the market drivers for file management software on openpr.com .
For Advanced Control, Fire Up PowerShell
When you need surgical precision, it’s time to turn to the command line. PowerShell might look a little intimidating at first, but it gives you unmatched control for complex renaming jobs.
For instance, say you have a folder full of client reports named like Client Report January.docx. Those spaces can cause chaos in some scripts or web apps. With a single PowerShell command, you can swap every space for an underscore.
Just navigate to your folder in a PowerShell window and run this:
Get-ChildItem *.docx | Rename-Item -NewName { $_.Name -replace ' ','_' }
That one-liner zips through every Word document, finds any spaces in the names, and replaces them with an underscore. It’s an incredibly powerful way to enforce a clean, consistent naming scheme across an entire project.
Here are a few other handy examples:
- Change File Extensions:
Get-ChildItem *.txt | Rename-Item -NewName { $_.Name -replace '\.txt','.md' }(This converts all your .txt files to Markdown .md files). - Add a Prefix:
Get-ChildItem *.jpg | Rename-Item -NewName { "Project-Alpha-" + $_.Name }(This prepends “Project-Alpha-” to every JPG filename).
Sure, there’s a bit of a learning curve with the command line. But investing a little time to learn a few key commands gives you a superpower for automating tedious tasks, saving you hours of work in the long run.
Effortless File Renaming for Mac Users
If you’re a Mac user, you’re sitting on some incredibly intuitive tools for wrangling your files. Many of them are hiding in plain sight, just waiting to save you from a sea of clicks and headaches. We’ll start with the most direct method for batch renaming.
Imagine a folder full of client files named things like Report Draft.docx, Client_Notes.pdf, and Final Graphic.png. That kind of inconsistency is a real drag on productivity. Thankfully, macOS has a powerful batch rename feature baked right into Finder.
All you have to do is select the files you want to change, right-click, and choose “Rename.” A clean little dialog box pops up, giving you straightforward options to add text, replace text, or completely reformat the names. It’s perfect for quick, on-the-fly organization.
A Practical Finder Renaming Example
Let’s get those client files into a consistent format like ClientName-Project-Date. It’s easier than you think.
- Grab your files: Just highlight all the project documents you need to rename in Finder.
- Pick your format: In the rename dialog, select the “Format” option.
- Define the structure: Set the “Name Format” to “Name and Index,” and then in the “Custom Format” field, type something like
ProjectX-2024-05-21-. - Preview and go: Finder instantly shows you what the new names will look like—for instance,
ProjectX-2024-05-21-1.docx. If it looks good, one click cleans up the whole mess.
This simple move transforms a chaotic folder into a professional, easy-to-scan archive. It’s a small tweak that brings a surprising amount of peace of mind.
By standardizing filenames, you’re not just tidying up; you’re building a system that reduces mental friction. You no longer have to remember what a file is—the name tells you instantly. This is a core principle of efficient digital organization.
Build Reusable Workflows with Automator
But what about those renaming tasks you do over and over? Constantly using Finder’s tool for the same thing can get old. That’s when Automator , another built-in Mac utility, becomes your secret weapon. Automator lets you build custom workflows—or “Quick Actions”—that you can trigger with a simple right-click.
Think about all the screenshots you take. They usually land on your desktop with generic names like Screen Shot 2024-05-21 at 10.30.00 AM.png. It’s messy, and the name tells you nothing. With Automator, you can create a workflow that automatically renames any screenshot you select, adding the creation date in a clean format like Screenshot-2024-05-21.png.
Once you save this workflow, the action appears in your right-click menu, ready to go anytime you need it.
Create Your First Quick Action
Let’s walk through building a simple workflow that adds a “DRAFT-” prefix to any document. This is a lifesaver for managing works-in-progress.
- Open Automator (you’ll find it in your Applications folder).
- Create a New Quick Action. When it asks for the document type, choose “Quick Action.”
- Set the Input. At the top of the workflow area, make sure it says “Workflow receives current” files or folders in Finder.
- Add the Action. From the library of actions on the left, find “Rename Finder Items” and drag it into the main workflow area. Automator will smartly ask if you want to add a “Copy Finder Items” step first. It’s a good idea to say yes—this creates copies to work on, leaving your original files untouched.
- Configure the Rename Step. In the “Rename Finder Items” action you just added, choose “Add Text” from the dropdown menu and simply type
DRAFT-into the text box. - Save Your Action. Give it a memorable name, like “Add Draft Prefix.”
That’s it. From now on, whenever you right-click a file in Finder, your new custom action will be waiting for you under the “Quick Actions” menu. This is how you start building a smarter, personalized system that works for you, giving you back precious time and energy.
Advanced Renaming With Third-Party Tools
Built-in OS tools are great for quick and simple renaming jobs, but eventually, you’ll hit a wall. When you need more power for a complex task, dedicated third-party apps and the command line are where the real magic happens. These tools offer a level of precision that can completely transform how you manage your files.
The Power of Dedicated Renaming Apps
If you need to mass rename files with complicated rules, starting with a specialized graphical user interface (GUI) app is your best bet. They pack the punch of advanced scripting into a much more approachable, visual package.
Tools like Bulk Rename Utility (for Windows) or A Better Finder Rename (for Mac) come with a mind-boggling array of options that leave simple find-and-replace in the dust. They’re designed from the ground up to tackle just about any renaming scenario you can dream up, giving you a safety net to organize with confidence.
One of their most powerful features is the ability to read file metadata. Let’s say you have thousands of photos from different cameras. A good renaming utility can:
- Extract EXIF Data: Automatically pull info like the date a photo was taken, the camera model, or even the lens used.
- Build Smart Filenames: Use that data to turn a cryptic filename like
_DSC9872.NEFinto something instantly useful, like2024-05-21_Nikon-Z6-II_Family-BBQ.NEF. - Enforce Consistency: Apply that same logic to a whole folder of images from different sources, creating a perfectly sorted and searchable archive in just a few clicks.
For a deeper look at what makes these tools so good, check out our guide to a batch rename utility and reclaim your time and peace of mind .
The single most important feature to look for in any third-party tool is a live preview. It shows you exactly what your files will look like before you commit to the change. This turns a potentially risky operation into a stress-free process of trial and error. That peace of mind is priceless.
For Ultimate Control: The Command Line
If you’re comfortable working without a GUI, the command line offers raw speed and flexibility that’s hard to beat. Linux and macOS users can tap into the versatile rename command, which often uses Perl expressions to pull off incredibly powerful transformations with just a single line of code. It’s the definition of working smarter.
Sure, the learning curve is a bit steeper, but the payoff is huge. One well-written command can save you the time it would take to manually click through a GUI app’s settings.
Practical Command-Line Renaming Examples
Let’s run through a few real-world situations where the rename command is a lifesaver. These examples show just how much you can get done with a tiny bit of code.
Standardize File Extensions: You’ve got a folder full of
.JPEGand.JPGfiles and want them all to be lowercase.jpg.rename 's/\.JPEG$/.jpg/' *.JPEGThis finds every file ending in.JPEGand neatly swaps the extension to.jpg.Replace Spaces with Underscores: Filenames with spaces can sometimes cause issues in scripts or on the web. This command tidies them up in one go.
rename 's/ /_/g' *It scans all files (*) in the folder, finds every space (g) it with an underscore (_).Convert All Filenames to Lowercase: For absolute consistency, you might want every filename to be in lowercase.
rename 'y/A-Z/a-z/' *This one simply transliterates (y) any uppercase character from A to Z into its lowercase version.
These tools represent the peak of manual file renaming. They give you all the control you need to whip your file system into shape, saving you countless hours and bringing a welcome sense of order to your digital world.
A Better Way: Let AI Handle the Naming for You
So far, we’ve walked through some great tools for renaming files in bulk. PowerShell, Finder, third-party apps—they’re all powerful, but they share one common trait: you have to be the brains of the operation. You’re the one telling the tool what to find, what to replace, and exactly what the new name should look like.
But what if your files could just… organize themselves? This is where AI provides a real solution, moving you to a truly hands-off approach that saves maximum time and mental energy.
We’re talking about more than just finding and replacing text. This is about smart systems that can actually look inside your documents to figure out what they are. Imagine an AI that sees a new invoice, automatically pulls the vendor’s name, the invoice number, and the date, and then renames and files it perfectly without you lifting a finger. That’s not science fiction; it’s the next evolution in file management.
Moving Past the Manual Grind
Let’s be honest, the biggest pain point with document organization is the endless, repetitive work. Every single invoice, receipt, or contract forces you to break your focus, figure out a logical name, and drag it into the right folder. It’s a slow, constant drain on your mental energy.
AI-driven systems are designed to completely get rid of that friction. Instead of you working on your files, your files work for you.
Here’s a practical example of how AI solves this pain point:
- The Old Way: You download a file called
invoice_scan_4432.pdf. You have to open it, see it’s from “Innovate Inc.” for invoice #5501, dated November 15, 2023. You then painstakingly rename itInnovateInc-INV5501-2023-11-15.pdfand move it to your “Invoices” folder. - The AI Way: You drop
invoice_scan_4432.pdfinto a smart folder. The AI scans the document, extracts all those key details, and automatically renames and files it. The job is done in the background before you’ve even thought about it, saving you time and giving you peace of mind.
This move toward intelligent automation is why the file rename software market is projected to nearly double by 2033, ballooning to around USD 300 million. Industries like media and healthcare, which are drowning in data, are driving this demand for smarter organization. You can see more data on this trend in this market report on file management solutions .
The whole point of using AI here isn’t just about a one-time cleanup. It’s about building a system that organizes itself forever, adapting as you go without needing constant babysitting.
How This “Zero-Touch” Organization Actually Works
This hands-off magic isn’t one single thing; it’s a trio of powerful technologies working in concert to read and understand your documents just like a person would, only much, much faster.
Here are the core ingredients:
- Optical Character Recognition (OCR): This is the first step. OCR technology scans images of text—like what you’d find in a PDF of a scanned receipt—and turns it into digital text that a computer can actually read.
- Natural Language Processing (NLP): Once the text is pulled out, NLP algorithms dive in to understand what it all means. They identify key bits of information like names, dates, amounts, and addresses to figure out the document’s purpose.
- Machine Learning (ML): This is what makes the system smart. It learns from your habits and your existing file structures. If it miscategorizes something and you fix it, the system remembers and gets more accurate over time.
This intelligent mix allows a tool to not just rename files but to genuinely understand them. It’s the ultimate solution for anyone who needs to mass rename files and wants to stop thinking about it for good.
If you’re interested in diving deeper into how this works, we have other articles that explore AI document management . This is how you achieve a digital workspace that stays organized with zero effort.
Best Practices for Safe File Renaming
Learning to rename files in bulk is a game-changer for organization, but it’s easy to create a massive headache if you’re not careful. Before you unleash a renaming rule on hundreds of files, it pays to have a few safety nets in place. These simple habits are what separate a quick win from a digital disaster.
The most important rule? Never, ever work on your original files.
Seriously. Just copy the files you plan to rename into a separate, temporary folder. If a rule goes sideways and you end up with a jumbled mess, your original files are still safe and sound. It’s a tiny bit of prep work that offers complete peace of mind.
Your Pre-Flight Checklist
Think of this as a quick cockpit check before you hit the big green button. Running through these steps will help you catch common mistakes before they turn into a recovery mission.
- Always Use the Preview Feature: Any decent renaming tool will show you what the new filenames will look like before you commit. This is your single best defense against a typo in your rule that could affect every file. Use it every single time.
- Start with a Small Batch: Even after a preview, I always recommend testing your rule on a small sample first. Grab 5-10 files and run the operation. It’s a quick, low-stakes way to confirm your logic works exactly as you intended.
- Watch Out for Naming Conflicts: Be careful with rules that might create duplicate filenames. For example, if your rule turns both
Client-Meeting-Notes.docxandClient-Follow-Up.docxintoClient.docx, you’re going to lose one of them.
Establish a Clear Naming Convention
A consistent naming scheme is the secret to a file system that actually works for you. It makes your files predictable, searchable, and easy to understand without having to open them.
A great filename tells a story.
2024-05-21-Project-Proposal-Draft.pdfgives you the date, subject, and status at a glance. That’s the goal—clarity without clicks.
Here are a few tips I’ve learned for building a system that lasts:
- Use Dates the Right Way: Stick to the
YYYY-MM-DDformat. This is the only way to ensure files sort chronologically by name, which is a lifesaver for project timelines and version control. - Ditch Spaces and Special Characters: Use hyphens (
-) or underscores (_) instead of spaces. This simple habit prevents all sorts of weird errors when you move files between different systems or upload them to the web. Characters like* ? " < > |are often forbidden and will just cause trouble.
Adopting these practices will help you build a system that stays organized for the long haul. For a deeper dive, check out these file naming conventions best practices to build a truly bulletproof workflow.
Got Questions? We’ve Got Answers
You’ve walked through a ton of methods for renaming files in bulk, but maybe you still have a few questions. Let’s tackle some of the most common ones I hear from people trying to get their digital lives in order.
Help! Can I Undo a Mass Rename if I Messed Up?
This is a big one, and the answer is… it depends.
Most specialized renaming apps have your back with a built-in ‘undo’ feature. They’re designed for this exact scenario. On the other hand, native tools like the command line or the basic Windows File Explorer are much less forgiving—once you hit enter, that change is pretty much permanent.
Pro Tip: This is why I can’t stress this enough: always back up your files before starting a big renaming job. Or, even better, work on copies. It’s the simplest way to avoid a major headache.
What’s the Best Way to Add Dates to File Names?
For clean, automatic sorting, the YYYY-MM-DD format is king. A file named 2024-10-27-Project-Report.pdf will sort perfectly every single time, no matter where you move it. It’s the international standard for a reason (ISO 8601
).
The real magic happens when you use a tool that can automatically grab the creation or modification date from the file’s metadata. This lets you add a consistent, sortable date to hundreds of files without any manual typing. It’s a game-changer for organizing photos or project documents chronologically.
Is It Safe to Use Special Characters in File Names?
Honestly, it’s best to just avoid them.
Characters like / \ : * ? " < > | are often used by operating systems for other things. Using them in a filename can lead to weird errors, files that won’t open, or sync problems with cloud services.
To keep your files happy and compatible everywhere (Windows, Mac, Linux, the cloud), stick to the basics:
- Letters (A-Z, a-z)
- Numbers (0-9)
- Hyphens (
-) - Underscores (
_)
I personally prefer hyphens over spaces because they play much nicer with web links and command-line tools.
How Can I Rename Files with Different Extensions in the Same Folder?
Ah, the classic project folder problem: a mix of images, documents, and videos all thrown together.
This is where more advanced renaming tools really shine. They let you filter your files by their extension. So, you can set up one rule for all your .jpg files (like adding dimensions) and a completely different rule for your .mov files (like adding the date), and run the whole thing at once. It’s a super-efficient way to standardize naming across a complex project.
Ready to stop renaming files and let them organize themselves? Fileo uses AI to automatically understand, rename, and file your documents, giving you back your time and focus. Get started and experience a truly zero-touch workflow at https://fileo.io .